Ever found yourself juggling between a spreadsheet on your laptop and a report on an external monitor, wishing you could view both at once? You’re not alone. Splitting your screen between a laptop and an external monitor can turbocharge your productivity, whether you’re working, gaming, or just multitasking. But if you’re new to this, setting it up might feel like decoding a secret code. No worries. I’ll walk you through everything—from hooking up your monitor, to splitting screens effectively, to tweaking display settings so the setup looks just right.
Ready? Let’s dive in.
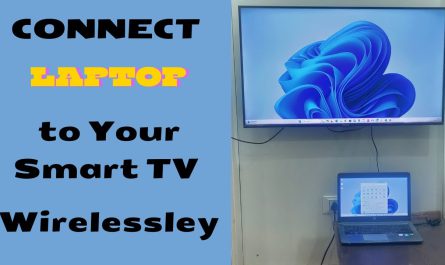
How Do I Connect a Laptop to an External Monitor?
Before we talk about splitting screens, your laptop and monitor need to be friends. Connecting them is the first step and can sometimes cause head-scratching.
1. Identify the Right Cable and Port
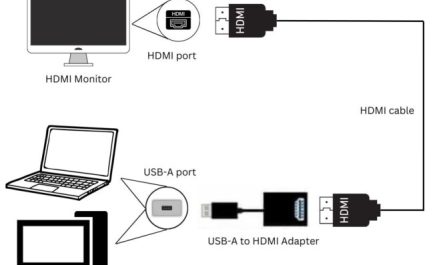
Here’s the deal: laptops and monitors come with all sorts of ports—HDMI, DisplayPort, USB-C, VGA, and even DVI on older models. Most modern laptops and monitors use HDMI or USB-C because they carry both video and audio in one cable.
How do you know which cable to use?
- Look at your laptop’s ports: If you see a slim port with a little “D” shape and a line at one end, that’s HDMI. If it’s oval-shaped, it might be USB-C.
- Check your monitor’s ports: Most monitors have at least HDMI and VGA. VGA is old-school VGA cable with blue connectors, usually best avoided if you want better image quality.
- Match the ports: If your laptop has HDMI and your monitor has HDMI, get an HDMI cable. If they don’t match, you might need an adapter. For example, USB-C to HDMI adapters are common.
Don’t worry if your laptop has a Thunderbolt or USB-C port but your monitor only has HDMI. A simple USB-C to HDMI adapter will do the trick. These adapters are cheap and easy to find online or at electronics stores.
2. Connect the Cable
Once you have the right cable or adapter:
- Plug one end into your laptop.
- Plug the other end into your monitor.
- Turn on the monitor.
Usually, your laptop will detect the external monitor automatically. If it doesn’t, don’t panic—we’ll cover how to fix that below.
What Are the Steps to Split Screen Between a Laptop and Monitor?
Okay, so your laptop and monitor are hooked up. Now, how do you split the screen between the two?
The good news: most operating systems make this surprisingly easy.
Step 1: Detect and Configure the Monitor
On Windows:
- Right-click on your desktop.
- Select Display settings.
- Scroll down to the Multiple displays section.
- Click Detect if your monitor isn’t showing up.
- Once detected, choose Extend these displays from the dropdown menu.
On macOS:
- Click the Apple menu and go to System Preferences.
- Select Displays.
- Go to the Arrangement tab.
- Make sure Mirror Displays is unchecked—this will extend your desktop instead of duplicating it.
Step 2: Arrange Your Displays Virtually
You’ll see small rectangles representing your screens. Drag these rectangles to match how your monitors are physically placed. For example, if your monitor is physically to the right of your laptop, drag the monitor rectangle to the right side of the laptop rectangle.
This step matters because when you move your cursor or windows from one screen to the other, it’ll follow your physical setup.
Step 3: Move and Snap Windows to Split Between Screens
Now, here’s the magic of splitting screens:
- On Windows, grab a window and drag it to the left or right edge of one screen until you see a faint outline or the window “snaps” into place, taking up half the screen.
- You can also use keyboard shortcuts (we’ll get to those soon).
- On macOS, click and hold the green full-screen button on the window’s top-left corner, then choose to tile the window to the left or right of the display.
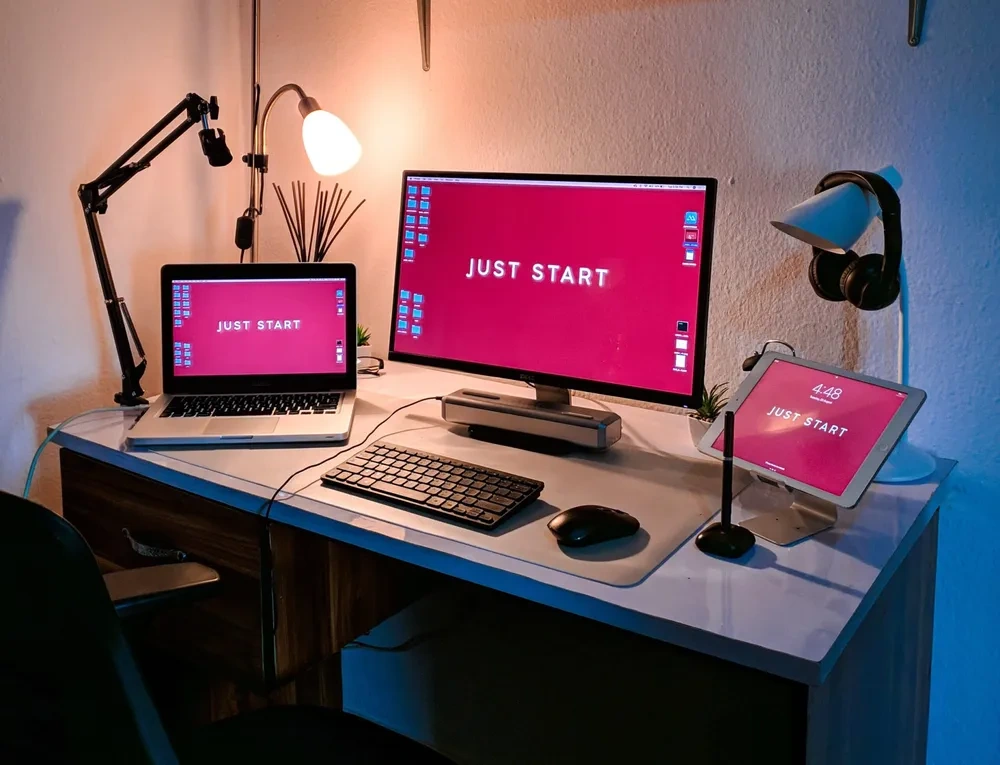
You can arrange multiple windows this way across your laptop and monitor screens, giving you a split-screen effect—but spread across two physical screens.
Which Keyboard Shortcuts Enable Split Screen on Different Operating Systems?
Keyboard shortcuts are perfect for when you want to split your screen quickly without dragging windows around.
Windows Keyboard Shortcuts
- Windows Key + Left Arrow: Snap the active window to the left half of the current screen.
- Windows Key + Right Arrow: Snap the active window to the right half.
- Windows Key + Up Arrow: Maximize window.
- Windows Key + Down Arrow: Minimize or restore window.
- Windows Key + P: Quickly switch between display modes like Duplicate, Extend, or Second screen only.
For example, if you want your Word document on the left half of your external monitor and your browser on the right half of your laptop screen, move your mouse cursor to that screen first, then use these shortcuts.
macOS Keyboard Shortcuts
macOS doesn’t have built-in keyboard shortcuts as flexible as Windows for snapping windows. But you can:
- Hold Option and click the green full-screen button to tile windows to the left or right.
- Use third-party apps like Magnet or BetterSnapTool for more control and keyboard shortcuts.
Bonus Tip
If you’re juggling multiple apps and windows, learning these shortcuts can save minutes every day. On Windows especially, once you get used to snapping windows with your keyboard, you’ll feel like a pro.
How Can I Adjust Display Settings for Optimal Split Screen Use?
Sometimes, you’ll find the screens don’t align perfectly—the text might look blurry on one screen, or the mouse cursor seems to “jump” oddly between screens. This usually happens because of differences in screen resolution or scaling between your laptop and monitor.
Step 1: Match Screen Resolutions or Scale
On Windows:
- Go to Display Settings.
- Under Scale and layout, check the Display resolution of both screens.
- Try to set the external monitor to its recommended resolution, usually its native resolution.
- Adjust Scaling (like 100%, 125%, 150%) to make text and apps appear larger or smaller.
On macOS:
- Open System Preferences > Displays.
- Select your external monitor.
- Choose Scaled and pick the resolution that fits best.
- You can also tweak the Display scaling to make items bigger or smaller.
Step 2: Calibration for Color and Brightness
If your monitor and laptop screen look drastically different in color or brightness, adjusting these can make your workspace easier on the eyes.
Most monitors come with buttons on their frames to adjust brightness, contrast, and color temperature. You can also use software calibration tools:
- Windows: Use Display Color Calibration (search in Start menu).
- macOS: Use ColorSync Utility.
Troubleshooting Common Issues
- Screen flickering or blank external monitor: Double-check cable connections. Sometimes a faulty or loose cable causes issues.
- Blurred text on one screen: Usually a scaling problem—try setting both displays to 100% scaling or use the recommended resolution.
- Cursor jumps oddly between screens: Make sure in the Arrangement tab (macOS) or Display settings (Windows), the monitor positions match their physical location on your desk.
FAQs About Splitting Screen Between Laptop and Monitor
| Question | Answer |
|---|---|
| Can I use any monitor with my laptop? | Most monitors work if they have the right port (HDMI, DisplayPort, etc.), but check compatibility first. |
| Why doesn’t my laptop detect my monitor? | Try pressing Windows + P and selecting Extend or Duplicate. Also, check cables and power on the monitor. |
| Can I use two external monitors? | Yes, but your laptop must support multiple displays. Some models do, others only support one external monitor. |
| Do external monitors drain my laptop battery? | Yes, slightly more than laptop screen alone, but usually minimal. Connect to power when possible. |
| What if scaling makes things look weird? | Adjust scaling on both screens for balance. Sometimes you’ll need to compromise for best comfort. |
Wrapping It Up
Splitting your screen between a laptop and an external monitor is a game-changer once you get the hang of it. Whether you’re chasing deadlines, handling multiple programs, or just enjoy having more screen real estate, it’s worth the effort.
Remember:
- Pick the right cable and port, and don’t hesitate to buy adapters.
- Use display settings to extend your desktop, not duplicate, for true split screen.
- Keyboard shortcuts save time, especially on Windows.
- Fix resolution and scaling mismatches to avoid blurry or awkward displays.
Tinker a bit with settings to find what works best for your eyes and workflow. And if you get stuck, there’s a ton of support online.
After all, your workspace should work for you—not the other way around.
References
- According to Microsoft Support, using the Windows + P keys allows users to quickly switch display modes on Windows laptops Microsoft Support.
- Apple’s official guide explains how to use Split View and external monitors on macOS Apple Support.
- Tips for optimizing dual-monitor setups and scaling sourced from DisplaySpecifications DisplaySpecifications.
If you’ve ever stared at a tangled mess of cables or got frustrated when your windows refused to snap, I hope this clears things up. Now, go ahead—hook up that monitor, split your screen, and enjoy the extra space!