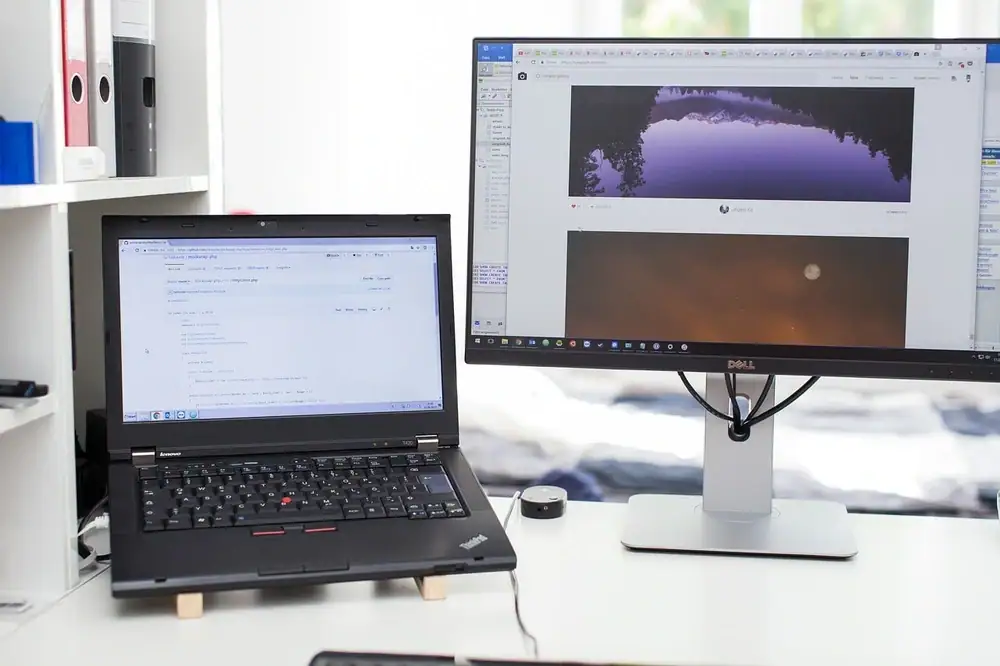
Ever wished you had an extra screen but didn’t want to shell out for a separate monitor? What if I told you your laptop could double as one? It sounds like magic, right? But before you get too excited, let’s clear the air: laptops don’t have native video input ports, so you can’t just plug in an HDMI cable and expect your laptop to act like a regular monitor. But don’t worry—there are ways around it, and I’m here to walk you through them, step by step.
In this guide, we’ll answer all your burning questions: Can you use your laptop as a monitor? What tools do you need? What quirks and limitations should you watch out for? And finally, how exactly do you set it up so that it works smoothly? Let’s jump in.
Can I Use My Laptop as a Monitor for Another Device?
Short answer: Yes, but with a caveat.
Unlike desktop monitors, almost no laptop comes with a video input port. The HDMI, DisplayPort, or USB-C ports on laptops are designed to send video out of your laptop — not receive video signals. So if you’re picturing plugging an HDMI cable from your gaming console or desktop PC into your laptop and it just “works,” that’s not going to happen.
But don’t get discouraged! You can still use your laptop’s screen as a second display using software solutions or specific hardware adapters. The difference is, it’s mostly done wirelessly or via a network connection, rather than through a direct video cable.
What Software or Hardware Do I Need to Use a Laptop as a Monitor?
There are two main ways to turn your laptop into an extra screen:
- Using Software (Over Network or Wi-Fi)
- Using Hardware Adapters (Capture Cards or USB Video Adapters)
1. Software Solutions: Screen Sharing & Remote Display Apps
This is by far the most common method. You’ll need:
- Both devices connected to the same Wi-Fi network (or via Ethernet for better performance).
- Software that allows your main device to send its display to the laptop, and the laptop acts as a receiver.
Some popular free or inexpensive options include:
| Software | Platforms Supported | Notes |
|---|---|---|
| SpaceDesk | Windows (viewer works on Windows, Android, iOS) | Free and easy setup; best for Windows PCs |
| Spacedesk | Windows, Android, iOS | Good for Windows PCs only |
| Windows 10/11’s “Projecting to this PC” | Windows only | Built-in, no install needed |
| Duet Display | Windows, Mac, iOS, Android | Paid app, works wired/wireless |
| Deskreen | Windows, Mac, Linux | Free, open-source, uses browser |
These apps basically transmit the video output over your local network to your laptop, turning it into a second screen.
2. Hardware Solutions: Using Capture Cards or Video Capture Devices
If you’re trying to connect a device with HDMI output (like a gaming console or another PC) to your laptop, one workaround is to use a capture card.
- A capture card connects to your laptop via USB.
- You plug your source device’s HDMI output into the capture card’s input.
- Using the capture card’s software, your laptop displays the video signal.
But heads up: capture cards introduce some lag and are primarily designed for recording or streaming. They’re not perfect as a monitor replacement for real-time gaming or high-speed tasks.
Are There Limitations or Compatibility Issues When Using a Laptop as a Second Screen?
Absolutely. Here are some common pain points:
1. No Native Video Input on Laptops
This is the biggest cause of confusion. Many people try to plug an HDMI cable directly into their laptop expecting an external display — it won’t work. Laptop ports are designed to output video only.
2. Lag and Performance Issues
Wireless solutions rely on your network. So if your Wi-Fi is patchy, you’ll see lag or stutter. Even wired setups using certain apps can have a delay, which is frustrating in fast-paced scenarios like gaming.
3. Compatibility Problems
- Some apps only work within the same operating system family (e.g., Windows-to-Windows).
- Others require you to install software on both devices.
- Old laptops or slow Wi-Fi routers can choke on the data stream.
4. Display Quality May Vary
- Resolution and refresh rates can be limited by software.
- Compression artifacts might appear over wireless connections.
- Color accuracy may be off compared to a dedicated monitor.
How Do I Set Up the Connection Between the Laptop and the Source Device?
Now, the fun part. Let’s walk through the step-by-step setup for the most beginner-friendly method: using Windows 10/11’s built-in “Projecting to this PC” feature.
Step-by-Step: Using Windows 10/11 to Use Your Laptop as a Second Monitor
What You’ll Need:
- Two Windows 10 or 11 devices (your main PC and your laptop).
- Both connected to the same Wi-Fi network.
- Updated versions of Windows (preferably recent builds).
Step 1: Enable “Projecting to this PC” on Your Laptop
- On your laptop (the one you want to use as a monitor), open Settings.
- Go to System > Projecting to this PC.
- Set “Some Windows and Android devices can project to this PC when you say it’s OK” to Available everywhere or Available everywhere on secure networks.
- Under the dropdown “Ask to project to this PC,” select Every time a connection is requested for security.
- Decide if you want to require a PIN for pairing.
- You can tweak power settings here as well.
Step 2: Connect From Your Main PC
- On your main PC (the device you want to extend or duplicate the display from), press Windows Key + K.
- A sidebar will pop up showing nearby devices available for projection.
- Click on your laptop’s name.
- On your laptop, accept the connection request.
- Your laptop’s screen will now act as a wireless second monitor.
Step 3: Adjust Display Settings
- On your main PC, right-click on the desktop and choose Display Settings.
- You can rearrange displays, choose to duplicate or extend, and set resolution preferences.
Alternative Software Setup: Using SpaceDesk
If both devices are Windows PCs, SpaceDesk is a solid free option.
Step 1: Download and Install SpaceDesk
- On the main PC, install the SpaceDesk Server from their official site.
- On your laptop, install the SpaceDesk Viewer app.
Step 2: Connect Devices
- Make sure both devices are on the same network.
- On your laptop, open the SpaceDesk Viewer.
- It should detect your main PC’s IP address automatically.
- Click to connect, and boom — your laptop screen becomes a second monitor.
Hardware Setup: Using a Capture Card
If you want to connect, say, a gaming console to your laptop:
What You’ll Need:
- An HDMI capture card (like the Elgato HD60).
- USB 3.0 port on your laptop.
- Source device with HDMI output.
Steps:
- Plug the capture card into your laptop’s USB port.
- Connect the source device’s HDMI output to the capture card’s HDMI input.
- Open the capture card’s companion software.
- You should see the device’s display on your laptop screen.
Note: The delay is usually around 100-200 ms, which makes gaming tricky but works fine for watching videos or desktop tasks.
Troubleshooting Common Issues
| Issue | Possible Cause | How to Fix |
|---|---|---|
| No connection found | Devices not on same network | Verify Wi-Fi/Ethernet connection |
| Display lags or stutters | Poor network or Wi-Fi interference | Use Ethernet cable or improve Wi-Fi router |
| No prompt to accept connection | Projection settings not enabled | Double-check “Projecting to this PC” is set properly |
| Low resolution or blurry screen | Network compression or settings | Adjust display settings, use wired connection |
FAQs
Can I use my MacBook as a monitor for Windows PC?
Not directly. Macs don’t have native video input either. Some apps like Duet Display can connect Macs and Windows machines over the network or USB, but it usually requires third-party software.
Will using my laptop as a monitor damage my device?
No. It’s safe. The laptop is just rendering a received video stream—no hardware stress beyond normal use.
How does wired vs. wireless setup compare?
Wired is usually more stable and lower-latency but requires compatible cables and ports. Wireless offers convenience but can introduce lag, especially on slow or congested networks.
Final Thoughts
Using your laptop as a monitor isn’t a plug-and-play scenario due to hardware limitations, but it’s totally doable. For most beginners, the Windows 10/11 built-in projection or software like SpaceDesk will get you up and running quickly. You’ll get a handy extra screen without spending a dime!
If you need to connect external devices like consoles, a capture card is your friend—just remember, it’s not a perfect substitute for a dedicated monitor.
So, next time you need that extra display, try these steps before rushing to the store. You might already have what you need, right in front of you.
References
[1] According to Microsoft Support, Windows 10 and 11 have a built-in feature called “Projecting to this PC” that allows one device to act as a wireless display for another. https://support.microsoft.com/en-us/windows/project-to-a-second-screen-in-windows-10-e1b88e85-39f0-e3b7-9b11-9d1e28286a12
[2] SpaceDesk official website explains their software enables multi-monitor setups over a network connection. https://spacedesk.net/
[3] Elgato’s website clarifies that capture cards introduce latency, making them less ideal for fast-paced gaming but great for streaming or recording. https://www.elgato.com/en/gaming/capture-cards
There you have it—a complete, beginner-friendly blueprint for turning your laptop into a second monitor. Got questions? Just ask!